Federated Blog: WriteFreely – How To Self-Host On A Potato
From the CAN YOU BELEIVE, THIS IS RUN ON A SPEAK AND SPELL POWERED BY TWO HAMSTERS ON A WHEEL? Dept.
#WordPress is nice and all, but it would be nice to have a blog that was ActivityPub friendly, and would fit in with #Mastodon, #Pixelfed, #Friendica and the rest of the #Fediverse. #WriteFreely is one. Here's how to set yourself up a #WriteFreely instance.
I originally was going to write this as a comparison between all the Fediverated or ActivityPub capable blogging platforms out there. But when I got into it, I realized that there are really only a few viable options, as per the Awesome Mastodon Big List of Everything Fediverse:Blogging (which is an exhaustive and actively maintained resource by the way check it out.).
I think when I migrated to Mastadon from #Birdsite in November, I thought there were way more federated blog platforms, but I've since discovered that some Mastadon instances and other microblogging services like #Calkey and #misskey have higher character caps than Mastadon by default – and that's what I was seeing.
So really WriteFreely was it, and I just dug right into setting it up.
Why are you ditching WordPress? We broke up. They were a high maintenance partner and I couldn't even touch the stylesheet
Why WriteFreely vs. ? What other options are there? What do I need to know about it? I wrote an FAQ – everything you need to know about WriteFreely.
Setting Up WriteFreely
I'm not going to regurgitate the Getting Started/Installation guide as it's already pretty good. I will however call attention to a few snags I ran into and a few bonus tips I discovered through experimentation.
WriteFreely is written in Go, for which there are cross-platform compilers. At the moment, the project only builds 64-bit linux binaries due to a tool issue (see the change notes), but if you're not afraid to compile from source you could set this up on a Windows PC if you wanted to.
Platform Choice – OpenSUSE linux
So for now lets go Linux. My “server” is an old gaming PC I've been using to run my TV for the last decade, with a stack of spare 60 and 80 GB drives shoved in. I choose OpenSUSE Tumbleweed after some research as
- SUSE isn't a “desktop” distro; it has a KDE desktop sure, but its intended for server operation not end user applications
- it has (Tumbleweed anyway) a continuously updated patch engine like Windows Update; I don't have to worry about keeping it up to date, I just have to schedule the automatic updates.
- its administration console, Yast, has both a graphical KDE interface, but it also runs from a CLI. Since Im shoving this in a corner of my basement without a monitor, the ability to administer it remotely is key.
Steps followed:
- download the network or offline x86_64: https://get.opensuse.org/tumbleweed/
- use the image to make a bootable USB key: https://en.opensuse.org/SDB:Live_USB_stick
- boot the PC from the USB key; install OpenSUSE
From here it was following the setup wizard really. When asked, I chose “Desktop with KDE Plasma” so I'd have a nice desktop environment for configuration.
After installation, I:
- disabled the “Network Manager” KDE utility so I could control the network interface manually so I could..
- configured the firewall setup/zone and bind it to the network interface: we need to open ports 80 (HTTP), 443 (HTTPs) and allow the ssh service for remote administration.
- configured Network Services > Hostnames
- enabled Samba Server so I could host a network share for static files I want to use in my blog posts (images, files) like
\\servername\img\blogname\– WriteFreely doesn't have an image/static file “upload” feature yet. - I used the Yast and zypper package managers to download and install MySQL (mariadb)
- you'll be prompted to create one or more “users” for the database. If you create a user for WriteFreely at this point make sure you write down the user name and its password. The username WriteFreely uses doesn't have to be “writefreely”, it can be “the database user”. I used “mysql”.
- used the MySQL command line tools to make sure the database timezone was UTC.
Download and install WriteFreely
Following the instructions here: https://writefreely.org/start
When yo get to the writefreely config start stage, this invokes a setup wizard. Most of the questions are straight forward and/or the parameters are described in more detail here: https://writefreely.org/docs/latest/admin/config. I would recommend reading through that list before you run the wizard, although you can always go back and do it again, or just modify the config.ini file it generates and restart writefreely.
You can configure WF to run Secure or Insecure. If secure, it will require a security certificate for HTTPs and host your blogs on port 443. Any request to HTTP on port 80 is redirected.
Eventually the wizard will ask you for site name (awadwatt.com in my case) and a hostname – this should match the fully qualified domain name of this WriteFreely host (e.g. https://awadwatt.com) – if you setup as writefreely.urdomain.org, be sure to include this. This host name is used to generate the crypto keys and it has to match how this host is visible to the internet, otherwise visitors will get HTTPS/TLS handshake errors when trying to view your blog: the hostname WriteFreely is responding from doesn't match the hostname in the security certificate its presenting to browsers: viewing browsers will go nope! and no one can read your blog.
When asked for database parameters, make sure to use the user name and pwd you wrote down for the database when you configured users in MySql earlier.
The bit about writefreely keys generate: this command has WF reach out to a free service at https://letsencrypt.org/ to generate its HTTPs certificate. What isn't mentioned is how Let's Encrypt will block/ignore your host making certificate requests if you do more than 5 requests in the space of an hour. Like, if you flail around trying to get a dynamic DNS working. So, what I'd recommend is running WriteFreely unsecured until you're ready to get things hooked up on the internet.
Don't run keys generate until you have a domain mapping setup! – jump ahead to the Dynamic DNS mapping section.
Troubleshooting
So at this point, you've configured WriteFreely and if you start it from the command line writefreely, you'll see a message about how its serving on port 80/443. If you point a web-browser on your home network to your server's hostname:
- you'll see your WriteFreely instance hosted OR
- you'll get a website didn't respond msg.
If the latter, check:
* firewall issues; WriteFreely doesn't register as a linux network service (by default) so it doesn't show up in most linux firewall managers (like Yast); all you can do is open the ports 80 and/or 443.
* if you want to see if WriteFreely is alive and responding, try from the WF host itself:
* curl -v HTTP://localhost – curl is a command line HTTP/s request tool; connecting to localhost sidesteps all firewalls; you should see WriteFreely respond and the curl request show up in the logs WriteFreely is dumping to the command line.
* curl -v HTTP://<IP address of WF on your network> -try the same thing but using the IP address of your server.
* curl -v HTTP://<hostname of wf on your network> – this will depend on the ability of your servers hostname to be able to resolve
* if the first one works but the latter two don't you have firewall issues or DNS resolution issues.
Once you sort these things out, using curl or a web-browser from another computer on your network you'll see the default WriteFreely page, and in the console where you started WF you'll see the requests from that remote computer appear.
Post installation Setup
We can run WriteFreely but we want to setup things so WriteFreely starts as a system service so if we have to reboot or whatever we don't have to remember to restart WriteFreely.
Steps taken: (I installed writefreely in /usr/local/bin/writefreely)
* I moved my config.ini to outside the WF folder so if I update later I don't destroy my config.ini with a default. Tell WF to use it in another location by stating writefreely -c <path/config.ini>
* wrote a script to launch WF and dump its standard out and any errors to a file. /usr/local/bin/run_wf:
#!/bin/bash
/usr/local/bin/writefreely/writefreely -c /usr/local/bin/config.ini > /var/log/writefreely.log 2>&1
- set WriteFreely up as a
systemdservice so it can be run by the system and various admin tools. Following https://doc.opensuse.org/documentation/leap/reference/html/book-reference/cha-systemd.html- created
/etc/systemd/system/writefreely.service:
- created
[Unit]
Description=writefreely systemd service unit file.
Requires=mariadb.service
After=mariadb.service
[Service]
ExecStart=/bin/bash /usr/local/bin/run_wf
Restart=always
RestartSec=5
[Install]
WantedBy=multi-user.target
- the Requires/After tells systems that WriteFreely should wait until after MySql starts before starting.
- ExecStart invokes the script above
- Restart* attepts to restart WF every 5 seconds if it stops running for whatever reason
Great! Now WriteFreely starts with our system and can be started/stopped with our admin tools (Yast) or from the command line with systemctl start/stop/restart writefreely
Post post setup Config
Now we have our WF instance running, we want to forward some ports through our home wifi router, host some images and map our domain to it points itself at our home's external IP address.
Setup WriteFreely to Host Images
I thought about throwing up a Pixelfed instance on this box – I have the disk space and the database. But I'd have to futz around with the conflicting port addresses and mapping/forwarding through my firewall, or get into subdomain mapping like pixelfed.awadwatt.com etc.
I toyed around with setting up an Apache virtual host at awadwatt.com/img/ on a random port (remember WF already gloms 80 and 443) and was able to get that to work, but as I found out, linking to unsecure http images from within a WriteFreely page hosted in secure https throws browsers for a loop; I'd have to run WF unsecure at port 80 for that to work or figure out how to get that virtual host, at a custom port (6900) to host https. Getting an Apache virtual host to do Secure HTTP NOT on port 443 was beyond my skills, or rather my patience. And having to type image URLs as https://awadwatt.com:6900/img/file.png got to be real tedious real fast.
Then I realized: WriteFreely already hosts images (or static files anyway)! The little draft icon  , the avatar icons, the (default) CSS stylesheets, the browser tab “favicon.ico” file etc.
Sure enough, poking around in
, the avatar icons, the (default) CSS stylesheets, the browser tab “favicon.ico” file etc.
Sure enough, poking around in /usr/local/bin/writefreely there's a statics folder, and everything in there is addressable from the domain root. So we could just toss our images in the statics folder, but we can do better than that; for one, I didn't want my images folder trashed whenever I upgraded the application.
So I linked a user specific sub-folder from the static folder to where the images live and made sure the user that WriteFreely runs as can traverse it. Remember that samba folder I created earlier? yep:
tezoatlipoca@famine:/usr/local/bin/writefreely/static> ls -lat
total 16
drwxrwxr-x 1 tezoatlipoca tezoatlipoca  118 Mar  9 14:32 .
-rwxrwxrwx 1 root         root           53 Mar  9 14:29 google296e6456a3479f2c.html
lrwxrwxrwx 1 root         root           23 Mar  6 22:00 tez -> /diskb/img/tezoatlipoca
drwxrwxr-x 1 tezoatlipoca tezoatlipoca   90 Mar  6 10:54 ..
drwxrwxr-x 1 tezoatlipoca tezoatlipoca   98 Nov 11 02:51 css
-rw-rw-r-- 1 tezoatlipoca tezoatlipoca 6090 Nov 11 02:51 favicon.ico
drwxrwxr-x 1 tezoatlipoca tezoatlipoca 1218 Nov 11 02:51 fonts
drwxrwxr-x 1 tezoatlipoca tezoatlipoca  852 Nov 11 02:51 img
drwxrwxr-x 1 tezoatlipoca tezoatlipoca  390 Nov 11 02:51 js
drwxrwxr-x 1 tezoatlipoca tezoatlipoca   20 Nov 11 02:51 local
So now (at least on my home network), all I have to do is save an image to \\famine\img\tezoatlipoca and it shows up at http://awadwatt.com/tez/
Dunno how robust WF's static hosting will hold up under punishment, but I've had a few img bearing posts get hit by a few hundred Mastodon instances and so far so good.
At some point Ill go back to that Apache virtual host method, I really want to get a CGI file uploading script working so I can upload images from work (without opening an ssh hole in my home router for sftp)
Port Forwarding
Not too much to say here other than log into your home wifi/internet router and forward ports 80 (http) and 443 (https) to your WriteFreely instance host.
To diagnose that your host is reachable, use a service like https://whatismyipaddress.com/ to determine your wifi router's external IP address. Then, use your cell phone (disable the wifi!) or from work/school/somewhere not at home, try and connect to that IP address. If you see your WriteFreely instance, huzzah!
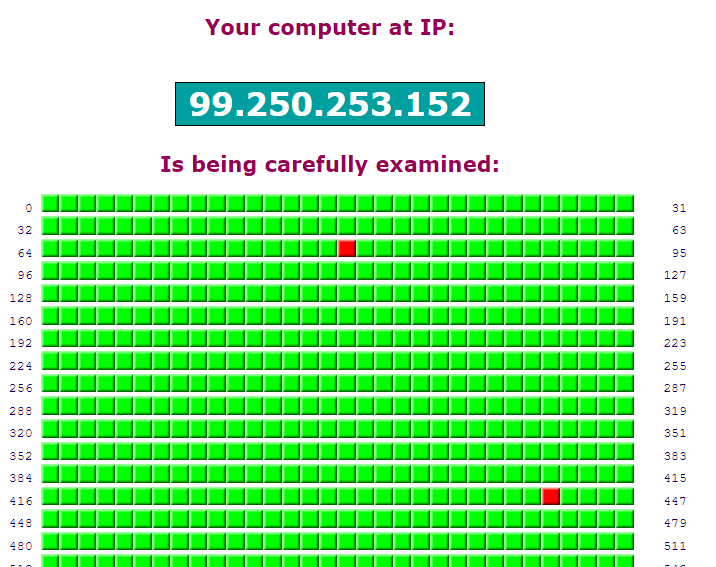
If not, check to see if those ports are open/being forwarded properly by probing those ports at that external IP address. The Shields Up! tool by Gibson Research > Scan “All system ports” has been around forever and its still good. The only ports you should see in red are 80 and 443:
Domain Mapping – Dynamic DNS
Our last step is to set up DNS mapping to our external IP. You could call it quits here, I suppose, and just say, “hey, my blog is at ,” but any Federated service that picks up your blog posts will always expect to find it at the same domain location. Home IP addresses on fixed cable/fibre connections tend not to change too much, but you can never be sure that your IP won't change. Having a static DNS domain->IP address mapping solves that problem.
If our instance was hosted by, or colocated IN an ISP's data center, then yes, part of that hosting arrangement would be allocation of a fixed IP address.
Fortunately, there are (paid, cheap or free) Dynamic DNS services. Essentially these work in two steps:
- YOU modify your (or some) domain registration (GoDaddy.com, Network Solutions, wherever you registered it) so that its DNS servers of record (i.e. the ones who own the mapping) are the Dynamic DNS services' servers.
- now, when a computer wants to find yourdomain.org, it asks ITS upstream DNS server (wifi router, ISP etc.); the upstream DNS server know to ask Dynamic DNS's DNS server; it will know. How?
- YOU tell Dynamic DNS's servers what IP address to map yourdomain.org TO.
- you can do this manually, or you can set up some automated job/process that runs periodically to update/confirm your server's IP address.
How you set this up will depend on the specific Dynamic DNS provider.
I used https://freedns.afraid.org/ which has both free and paid tiers of dynamic DNS mapping. At my domain registrar, I changed my domain registration's DNS servers:
Domain Name: AWADWATT.COM
Registrar WHOIS Server: whois.networksolutions.com
Registrar URL: http://networksolutions.com
Creation Date: 1999-08-25T21:28:32Z
<snip>
Name Server: NS1.AFRAID.ORG
Name Server: NS2.AFRAID.ORG
Name Server: NS3.AFRAID.ORG
Name Server: NS4.AFRAID.ORG
to theirs.
Then, an hourly cron (scheduled system task) job runs to update the afraid.org name servers with my external IP address. Easy!
Just remember the SSL keys that writefreely keys generate depend on the domain address your instance is found at. So once you get your domain mapping up, be sure to go back and create secure https keys otherwise visiting clients/federated services will get TLS and SSL errors – the host/domain in the keys doesn't match how your server appears on the internet.
Also: DNS propagation can take some time: several days. So don't be surprised after changing your domain > DNS servers and setting up dynamic DNS mapping, it could take several hours to several days before your WriteFreely instance consistently is available at yourdomain.org.
Done! Whats left? Feedback
That wasn't so bad? Figuring this out and flexing some long dormant linux skills took me maybe 6? 8? hours over a weekend. Im sure I could do this in just a few hours. I'd still like to:
- try and get WriteFreely running on Windows; there are some older Windows binaries available in various repositories, but supposedly its possible to compile from source. But getting a current Windows binary (or a MacOS one!) makes self-hosting available to so many more people.
- figure out an image uploading mechanism to complement my static subfolder link hack. For one, if I have guest accounts on my WF instance I'd like to be able to offer them image hosting capabilities, without having to log into my home wifi to do it.
- in-post table of contents using headers! – sometime in the last week or so I saw a post from a Write.As user who figured out a way – using only CSS – to dynamically generate a table of contents of all the headers in your post; gotta dig that up.
- experiment with CSS for customization – DONE
- Put behind NGINX
Did you follow this? Did It work? Problems?
Seriously, I'd love to hear from you. tezoatlipoca @ gmail.com or @tezoatlipoca @ mas.to.
Changelog
2023-03-07 – initial 2024-10-15 – CSS and NGINX links.